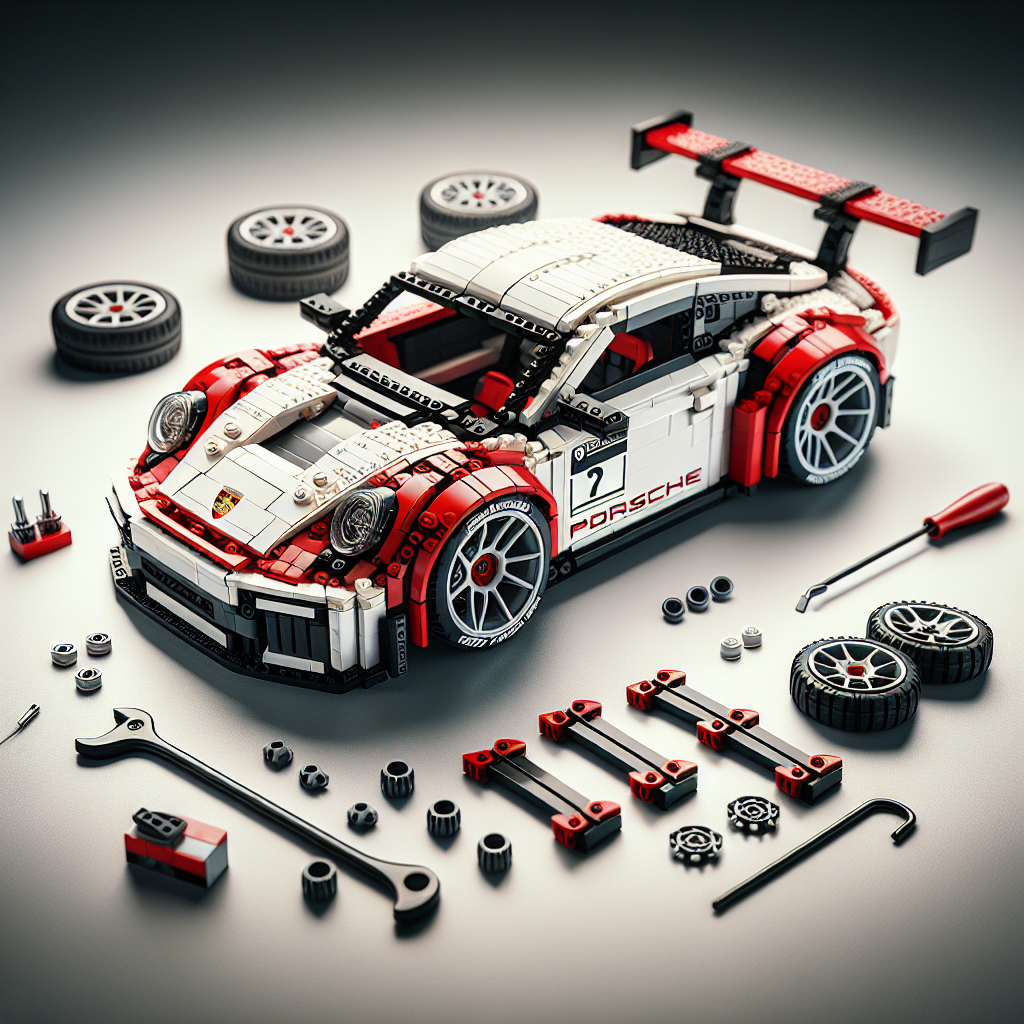
Discover how to enhance your LEGO Porsche RSR with third-party parts for improved performance and style. Unlock new possibilities for your build!
Upgrading your LEGO Porsche RSR with third-party parts can enhance its aesthetics, performance, and overall playability. Here’s a step-by-step guide to help you through the process:
### 1. **Research and Planning**
– **Identify Goals**: Decide what aspects you want to upgrade. This could include improving the car’s appearance, adding functionality, or enhancing structural integrity.
– **Explore Third-Party Options**: Look for third-party parts from reputable brands like BrickLink, BrickForge, or MOC (My Own Creation) designers. Check forums and communities for recommendations.
### 2. **Gather Necessary Tools**
– **Basic LEGO Tools**: A brick separator can help you disassemble parts without damaging them.
– **Screwdriver**: If you’re adding electronic components, a small screwdriver may be necessary.
### 3. **Select Upgrades**
– **Wheels and Tires**: Consider upgrading to larger or more detailed wheels and tires for better aesthetics and performance.
– **Custom Decals**: Look for custom stickers or decals to enhance the car’s branding and details.
– **Lighting Kits**: Add LED lights for headlights and taillights to make your model more realistic.
– **Performance Parts**: If you want to enhance the car’s playability, consider adding parts that improve suspension or steering.
### 4. **Disassemble the Model**
– Carefully take apart the sections of your LEGO Porsche RSR that you plan to upgrade. Use the brick separator to avoid damaging any pieces.
### 5. **Install Upgrades**
– **Wheels and Tires**: Replace the existing wheels with your new ones. Ensure they fit properly and rotate smoothly.
– **Decals**: Apply any custom decals according to the instructions provided. Make sure the surface is clean for better adhesion.
– **Lighting**: Follow the instructions for your lighting kit. This may involve connecting wires and securing battery packs.
– **Performance Parts**: If you’re adding new components for performance, follow the specific instructions for those parts.
### 6. **Reassemble the Model**
– Once all upgrades are installed, carefully reassemble the model. Ensure that all parts fit snugly and that nothing is loose.
### 7. **Test and Enjoy**
– After reassembly, test the upgraded features. Check the functionality of wheels, lights, and any other enhancements.
– Enjoy your upgraded LEGO Porsche RSR! Share your modifications with the LEGO community for feedback and inspiration.
### 8. **Maintenance**
– Regularly check the upgraded parts for wear and tear. Clean any dust or debris to keep your model looking its best.
### Tips:
– **Compatibility**: Ensure that any third-party parts you purchase are compatible with LEGO pieces.
– **Community Feedback**: Engage with online LEGO communities for advice and inspiration on upgrades.
– **Documentation**: Keep track of any modifications you make for future reference or if you decide to revert to the original design.
By following these steps, you can successfully upgrade your LEGO Porsche RSR and make it a unique and personalized model!
Upgrading your LEGO Porsche RSR with third-party parts can enhance its aesthetics, functionality, and overall enjoyment. Here’s a step-by-step guide on how to do it:
### Upgrading Your LEGO Porsche RSR with Third-Party Parts: A Step-by-Step Guide
Upgrading your LEGO Porsche RSR with third-party components can significantly enhance its aesthetics, functionality, and overall enjoyment. This guide provides a structured approach to effectively modify your model while ensuring a seamless integration of new parts.
#### Step 1: Research and Planning
1. **Identify Your Goals**: Determine what aspects of the Porsche RSR you wish to enhance. This could include improved aesthetics, better functionality, or additional features such as custom decals or upgraded wheels.
2. **Explore Third-Party Options**: Investigate reputable third-party manufacturers that offer compatible parts for LEGO models. Websites such as BrickLink, BrickForge, and Shapeways can provide a variety of options.
3. **Gather Inspiration**: Look for images and videos of modified LEGO Porsche RSR models online. This can help you visualize potential upgrades and inspire your design choices.
#### Step 2: Selecting Parts
1. **Choose Aesthetic Enhancements**: Consider parts that improve the visual appeal of your model, such as custom decals, upgraded headlights, or unique color schemes.
2. **Functional Upgrades**: Look for parts that enhance the functionality of your model, such as improved suspension systems, custom wheels, or enhanced engine details.
3. **Compatibility Check**: Ensure that the selected parts are compatible with the existing LEGO components of your Porsche RSR. Review specifications and dimensions to avoid any fitting issues.
#### Step 3: Procurement
1. **Purchase Parts**: Once you have finalized your selection, proceed to purchase the chosen third-party parts. Ensure that you are buying from reputable sellers to guarantee quality.
2. **Organize Your Components**: Upon receiving your parts, organize them systematically. This will facilitate a smoother assembly process.
#### Step 4: Disassembly
1. **Carefully Disassemble the Model**: Begin by gently disassembling the existing components of your LEGO Porsche RSR. Take care to keep track of all pieces to avoid losing any parts.
2. **Document the Process**: Consider taking photographs during disassembly. This can serve as a reference for reassembly and help you remember the original configuration.
#### Step 5: Installation of Upgrades
1. **Install Aesthetic Enhancements**: Begin by adding any visual upgrades, such as decals or custom parts. Ensure that they are securely attached and aligned properly.
2. **Integrate Functional Upgrades**: Proceed to install any functional components. Follow any provided instructions carefully to ensure proper installation and functionality.
3. **Test Fit**: As you install new parts, periodically test fit the model to ensure that everything aligns correctly and functions as intended.
#### Step 6: Reassembly
1. **Reassemble the Model**: Once all upgrades are installed, carefully reassemble your LEGO Porsche RSR. Refer to the photographs taken during disassembly to guide you.
2. **Final Adjustments**: Make any necessary adjustments to ensure that all components fit snugly and that the model operates smoothly.
#### Step 7: Enjoy and Showcase
1. **Display Your Upgraded Model**: Once reassembled, find a suitable location to display your enhanced LEGO Porsche RSR. Consider showcasing it alongside other models or in a dedicated display case.
2. **Share Your Work**: Document your upgraded model through photographs or videos and share your creation with the LEGO community. Online forums and social media platforms can be excellent venues for showcasing your work and receiving feedback.
3. **Continual Improvement**: Consider future upgrades or modifications as new third-party parts become available. The world of LEGO customization is ever-evolving, and there are always new possibilities to explore.
By following this structured approach, you can successfully upgrade your LEGO Porsche RSR with third-party parts, enhancing both its aesthetic appeal and functionality while enjoying the creative process.
### 1. **Research and Plan**
### 1. Research and Plan
#### A. Define Objectives
1. **Identify Goals**: Clearly outline the primary objectives of the research. What specific questions are you aiming to answer? What outcomes do you hope to achieve?
2. **Establish Scope**: Determine the boundaries of the research. What topics will be included, and what will be excluded?
#### B. Conduct Preliminary Research
1. **Literature Review**: Gather existing information related to your topic. Utilize academic journals, books, and reputable online sources to understand the current state of knowledge.
2. **Identify Gaps**: Analyze the literature to identify areas that require further investigation or are underexplored.
#### C. Develop a Research Methodology
1. **Select Research Design**: Choose an appropriate research design (qualitative, quantitative, or mixed methods) based on your objectives and the nature of the data required.
2. **Determine Data Collection Methods**: Decide on the methods for data collection (surveys, interviews, experiments, etc.) and develop the necessary tools (questionnaires, interview guides, etc.).
#### D. Create a Timeline
1. **Establish Milestones**: Break down the research process into manageable phases and set deadlines for each phase.
2. **Allocate Resources**: Identify the resources (time, personnel, budget) required for each phase of the research.
#### E. Identify Stakeholders
1. **Engage Relevant Parties**: Identify individuals or groups who have a vested interest in the research outcomes. This may include academic peers, industry professionals, or community members.
2. **Plan Communication**: Develop a strategy for communicating with stakeholders throughout the research process, including updates and findings.
#### F. Ethical Considerations
1. **Review Ethical Guidelines**: Ensure that your research adheres to ethical standards, including informed consent, confidentiality, and the responsible use of data.
2. **Obtain Necessary Approvals**: If applicable, seek approval from relevant ethics committees or institutional review boards.
#### G. Finalize the Research Plan
1. **Compile Documentation**: Create a comprehensive research plan that includes objectives, methodology, timeline, and ethical considerations.
2. **Review and Revise**: Seek feedback from peers or mentors and make necessary revisions to strengthen the research plan.
By following these structured steps, you will be well-prepared to conduct thorough and effective research that meets your defined objectives.
– **Identify Goals**: Decide what aspects you want to upgrade. This could include improving the car’s performance, adding more realistic details, or enhancing its display value
**Identify Goals**: Establish clear objectives for the upgrade process. Consider the specific aspects you wish to enhance, such as improving the vehicle’s performance metrics, incorporating more realistic design elements, or augmenting its aesthetic appeal for display purposes. Clearly defined goals will guide the decision-making process and ensure that the upgrades align with your overall vision for the vehicle.
Explore the fascinating world of LEGO cars, from their evolution and building techniques to customization and educational benefits. Discover how these models blend creativity and engineering, offering endless fun for builders of all ages.
Explore the exciting world of LEGO cars! This article delves into their history, design principles, educational benefits, and the vibrant community surrounding LEGO car building.