Discover creative ways to enhance your LEGO car sets with landscaping ideas, adding realism and charm to your builds for a stunning display!
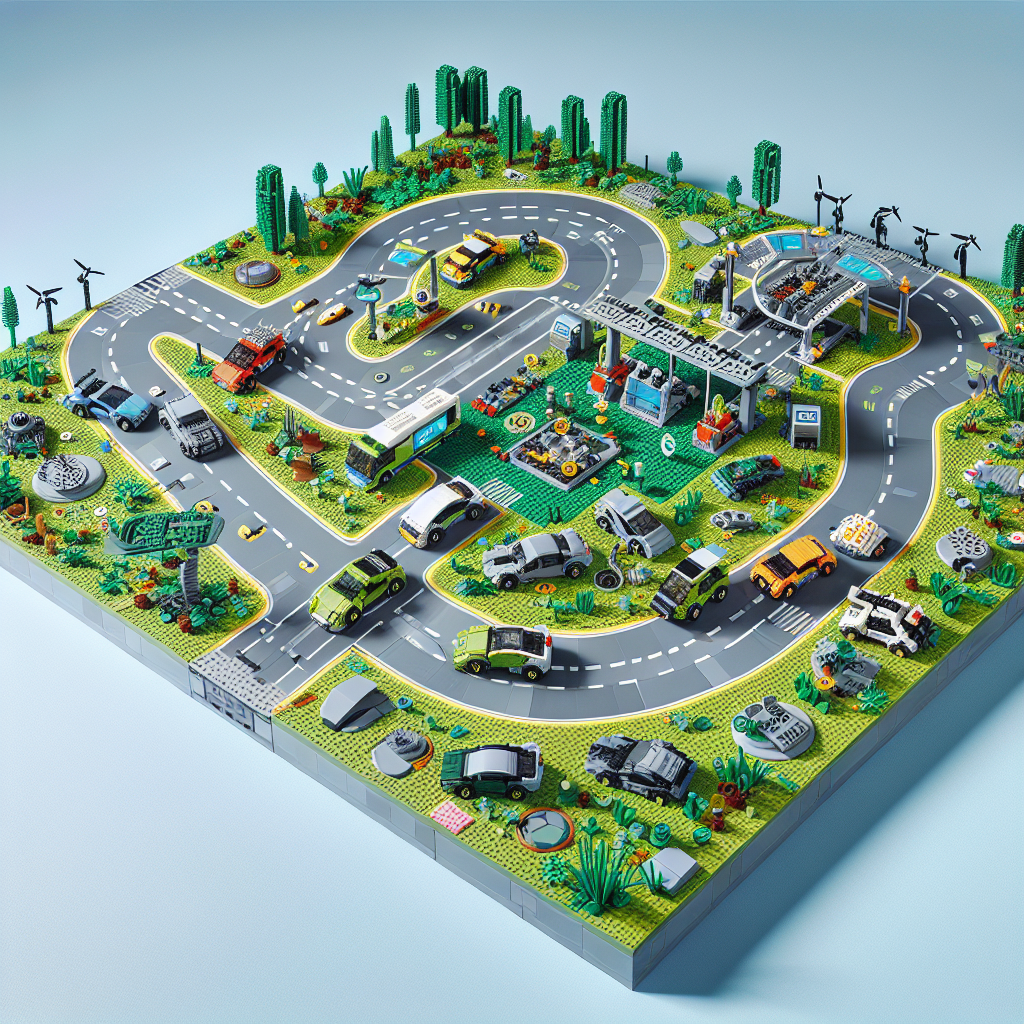
Enhancing your LEGO car sets with landscaping can add depth and creativity to your builds, making them more visually appealing and immersive. Here are some tips and ideas to help you create a vibrant landscape for your LEGO car sets:
### 1. **Choose a Theme**
– Decide on a theme for your landscape, such as urban, rural, desert, or mountainous. This will guide your color choices and the types of elements you include.
### 2. **Baseplate Selection**
– Use baseplates to create a solid foundation for your landscape. Choose colors that match your theme (green for parks, gray for urban areas, etc.).
### 3. **Terrain Variation**
– Create different elevations using bricks and plates to add hills, valleys, or cliffs. Use slopes and wedges to create smooth transitions between levels.
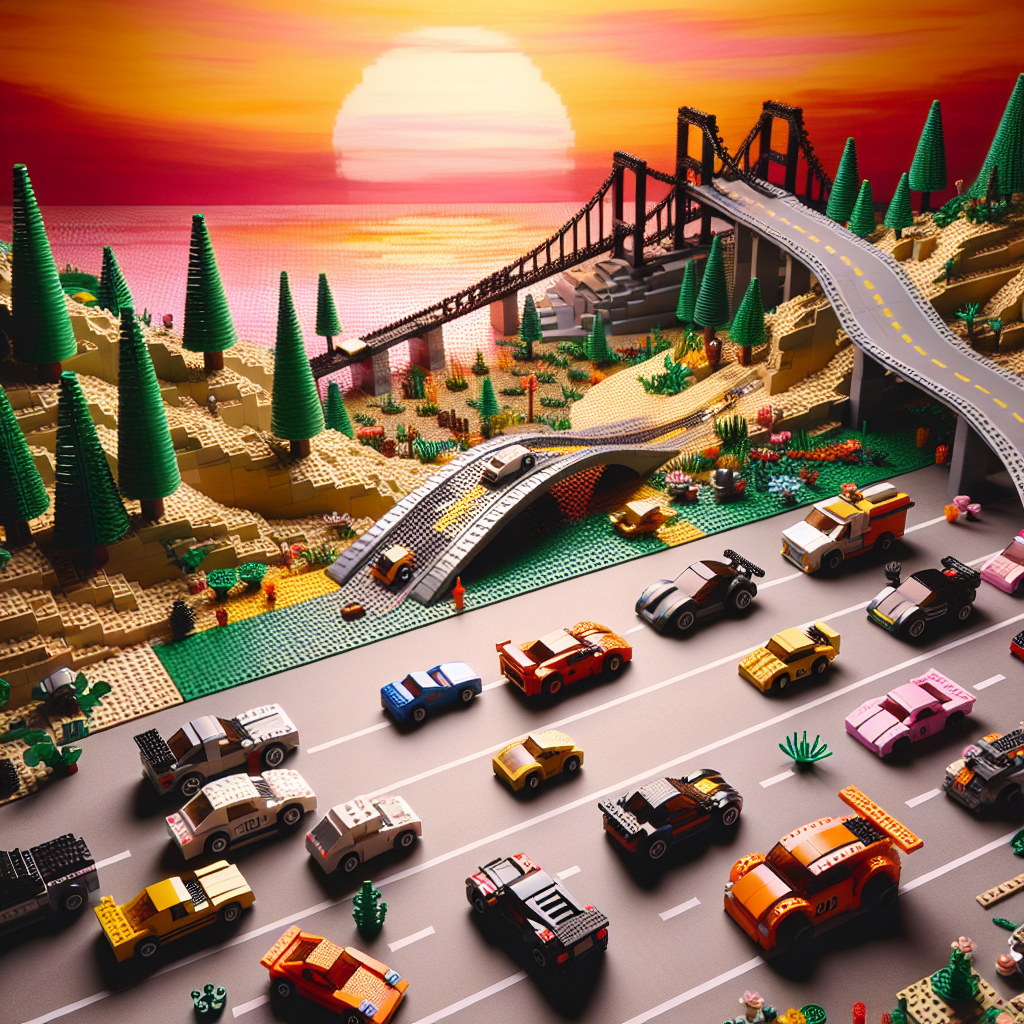
### 4. **Roads and Pathways**
– Design roads using flat tiles or plates. You can create winding roads, straight paths, or even off-road trails. Use different colors or textures to differentiate between types of roads.
### 5. **Natural Elements**
– Incorporate trees, bushes, flowers, and grass. LEGO offers various plant pieces, or you can create your own using green bricks and foliage elements.
– Use LEGO’s “plant” pieces or create custom plants with small bricks.
### 6. **Water Features**
– Add ponds, rivers, or lakes using blue tiles or transparent pieces. You can create a waterfall effect with clear bricks or slopes.
### 7. **Buildings and Structures**
– Include small buildings, garages, or service stations to create a more complete scene. Use different architectural styles to match your theme.
– Consider adding fences, benches, or streetlights for added detail.
### 8. **Minifigures and Accessories**
– Populate your landscape with minifigures engaged in various activities (e.g., walking, biking, or having a picnic). This brings life to your scene.
– Use accessories like bicycles, pets, or outdoor furniture to enhance the realism.
### 9. **Seasonal Themes**
– Change the landscaping based on seasons. For example, use white bricks for snow in winter or vibrant colors for flowers in spring.
### 10. **Lighting**
– If you want to take your display to the next level, consider adding LED lights to highlight certain areas or create a nighttime effect.
### 11. **Interactive Elements**
– Create movable parts, such as a drawbridge or a working gate, to make your landscape more interactive.
### 12. **Incorporate Vehicles**
– Position your LEGO cars in dynamic ways, such as parked, racing, or in a car wash, to create a narrative within your landscape.
### 13. **Experiment and Iterate**
– Don’t be afraid to experiment with different layouts and designs. Take photos of your builds and make adjustments based on what you like or don’t like.
### 14. **Community Inspiration**
– Look for inspiration from the LEGO community online. Websites, forums, and social media platforms often showcase creative landscaping ideas.
By combining these elements, you can create a rich and engaging environment for your LEGO car sets that enhances the overall experience and showcases your creativity. Happy building!
Enhancing your LEGO car sets with landscaping can create a more immersive and visually appealing display. Here are some ideas to help you get started:
Enhancing your LEGO car sets with landscaping can significantly elevate the overall aesthetic and create a more immersive display. Here are several formal suggestions to help you get started:
1. **Baseplates and Terrain**: Utilize baseplates to establish a foundation for your landscape. Consider varying the terrain by incorporating hills, valleys, or flat areas to create a more dynamic environment. Use different colors and textures of baseplates to represent grass, dirt, or water.
2. **Vegetation**: Introduce a variety of plant life to your display. Utilize LEGO foliage elements such as trees, bushes, and flowers to add color and depth. Consider creating a small garden, park, or forest area adjacent to your car set to enhance the natural surroundings.
3. **Roadways and Pathways**: Design custom roadways or pathways using LEGO bricks or plates. Incorporate details such as sidewalks, curbs, and road markings to create a realistic driving environment. You may also consider adding traffic signs and signals for added authenticity.
4. **Buildings and Structures**: Integrate buildings or structures that complement your car set. This could include gas stations, parking lots, shops, or residential homes. Ensure that the architectural style of these structures aligns with the theme of your car set.
5. **Water Features**: Introduce water elements such as ponds, rivers, or lakes to your landscape. Use transparent blue or clear bricks to simulate water, and consider adding small boats or docks for added detail.
6. **Lighting**: Incorporate LED lights to illuminate your display, especially if you plan to showcase it in low-light conditions. Strategically placed lights can highlight specific areas, such as the car itself or key landscaping features.
7. **Miniature Figures**: Populate your landscape with LEGO minifigures to create a sense of life and activity. Position them in various scenarios, such as walking along pathways, enjoying a picnic, or working at a gas station.
8. **Seasonal Themes**: Consider adapting your landscape to reflect different seasons. For example, you could create a winter scene with snow-covered trees and ice-skating figures, or a summer scene with beach elements and sunbathers.
9. **Thematic Elements**: Tailor your landscaping to fit a specific theme, such as a cityscape, countryside, or futuristic environment. This will help create a cohesive narrative within your display.
10. **Interactive Features**: Incorporate interactive elements such as moving parts, such as a working drawbridge or a rotating car wash. This can enhance engagement and provide a unique experience for viewers.
By thoughtfully integrating these landscaping ideas, you can create a captivating and immersive display that enhances the visual appeal of your LEGO car sets.
### 1. **Create a Baseplate**
### Creating a Baseplate: A Formal Guide
#### Introduction
A baseplate serves as a foundational element in various applications, including construction, manufacturing, and design. This guide outlines the steps necessary to create a baseplate, ensuring precision and adherence to industry standards.
#### Materials Required
1. **Base Material**: Choose an appropriate material based on the application (e.g., metal, plastic, wood).
2. **Tools**:
– Measuring tape
– Level
– Saw (if cutting is required)
– Drill
– Fasteners (screws, bolts, etc.)
– Safety equipment (gloves, goggles)
#### Steps to Create a Baseplate
1. **Determine Specifications**:
– Define the dimensions of the baseplate based on the intended use.
– Consider load-bearing requirements and environmental factors.
2. **Select Material**:
– Choose a material that meets the specifications and is suitable for the environment (e.g., corrosion-resistant for outdoor use).
3. **Measure and Mark**:
– Use a measuring tape to mark the dimensions on the material.
– Ensure all measurements are accurate to avoid discrepancies during assembly.
4. **Cut the Material**:
– Using a saw, carefully cut the material according to the marked dimensions.
– Ensure straight cuts for a proper fit.
5. **Smooth Edges**:
– Sand down any rough edges to prevent injury and ensure a clean finish.
6. **Drill Holes (if necessary)**:
– If the baseplate requires fastening to another structure, drill holes at the designated points.
– Ensure the holes are evenly spaced and aligned.
7. **Level the Baseplate**:
– Place the baseplate in its intended location.
– Use a level to ensure it is flat and stable.
8. **Secure the Baseplate**:
– Fasten the baseplate using appropriate fasteners.
– Ensure all connections are tight and secure to maintain stability.
9. **Final Inspection**:
– Conduct a thorough inspection to ensure the baseplate meets all specifications and is free from defects.
– Make any necessary adjustments before final use.
#### Conclusion
Creating a baseplate requires careful planning, precise execution, and adherence to safety standards. By following these steps, one can ensure a robust and reliable foundation for various applications. Always consult relevant industry standards and guidelines to ensure compliance and safety.
– **Choose a Baseplate:** Start with a large green or gray baseplate to serve as the foundation for your landscape
– **Select a Baseplate:** Begin with a sizable green or gray baseplate to establish a solid foundation for your landscape design. This baseplate will provide a versatile backdrop for your creative elements and help define the overall layout of your scene.
Explore the fascinating world of LEGO cars, from their evolution and building techniques to customization and educational benefits. Discover how these models blend creativity and engineering, offering endless fun for builders of all ages.
Explore the exciting world of LEGO cars! This article delves into their history, design principles, educational benefits, and the vibrant community surrounding LEGO car building.